Why Starting a Shopify Store in 2022 Makes Sense
For most people, starting a Shopify store can be very exciting and somewhat overwhelming at the same time. You probably have big plans on what products to sell, how you want it to affect the lives of your customers, how you’ll get to read their positive reviews and keep your business running for years to come, etc.
But as a beginner, there are probably many things you do not know about the world of eCommerce, and this can be frustrating. eCommerce platforms like Shopify make it pretty easy to build an online store that looks great and works perfectly without having any special design or coding skills.
So if you want to start a Shopify store but have no idea how to go about it, this guide is for you. This guide will provide all the details you need to start a Shopify store, including the benefits of selling on the platform, what you need to set up your Shopify store, the costs that go into it, and ultimately, the steps to follow to set up your Shopify store.
Are you ready to learn how to set up your Shopify store? Let’s get started!
What is Shopify, and How Does It Work?
With over two million daily active users, Shopify is one of the most popular eCommerce platforms. It is a leading eCommerce platform with tools to efficiently build and run your online store. You can do all these without any technical knowledge of design or coding.
Shopify’s business structure is straightforward, appeals to small and medium-sized businesses, and can even cater to large enterprises. You are required to pay a monthly subscription fee, and in turn, Shopify provides all the tools you need to develop, launch, organize and run your online store successfully. In case you’re using another eCommerce platform, it’s quite easy to migrate your store to Shopify such as OpenCart to Shopify, Wix to Shopify.
Why Should You Sell on Shopify?
Depending on several factors like your niche and the number of products you plan to list, it could cost you between $5,000 and $500,000 to design and develop your own eCommerce website.
This would be a worthwhile investment in the long term for your business if your budget were that big. However, this may be too high for owners of small businesses.
Despite being the leading platform for running an online store, Shopify is not the only option in the market. There are several other alternatives to Shopify, and most of them offer slightly similar features.
Regardless, many online entrepreneurs would rather pick Shopify and even consider it the best option. Here is why:
- Shopify is currently one of the largest eCommerce platforms.
- It is one of the fastest-growing platforms for running an online store with a 20% market share.
- It provides an extensive range of eCommerce tools, including design and customization options.
- Shopify websites are very mobile-friendly.
- With Shopify, cross-channel selling is very easy to implement.
- Most people consider Shopify’s point-of-sale app to be one of the best.
- Shopify users can set up accelerated mobile pages (AMP).
- It has a robust and efficient order fulfillment solution.
Shopify comes with lots of payment solutions and gateways. They include Shopify Payments, Point of Sale (POS), etc. Plus, it offers one of the best shipping services (Shopify Shipping) at little or no extra cost. Shopify also allows its users to integrate various third-party apps into their store.
Regarding cross-channel selling, Shopify has created a system that allows its users to easily integrate their Shopify stores into other channels to increase conversion and drive sales. With Shopify’s ability to integrate with social media platforms like Instagram, Facebook, and Tiktok, users can now reach a wider audience and convert their followers into customers.
How Long Does It Take To Set Up a Shopify Store?
If you follow this guide, you should be able to set up your Shopify store in less than 30 minutes. However, keep in mind that your business ideation and planning process is not included in this timeframe.
Outside this timeframe, you may need to do other things like getting a business idea, drafting a business plan, conducting your market survey and research, getting the necessary legal framework you may need to put in place, getting trustworthy suppliers, picking your preferred Shopify theme, and planning out the layout of your store.
If you factor in all this and the fine-tuning of your business plans before and after setting up your Shopify store, the entire process can span over some days or even weeks.
How Much Does It Cost To Set Up a Shopify Store?
The cost of setting up your Shopify store depends on your needs and budget. Shopify created different pricing plans to cater to business owners with varying needs and budgets.
Shopify offers a 14-day free trial period to allow you test-run the platform and determine if it is a good fit for your business.
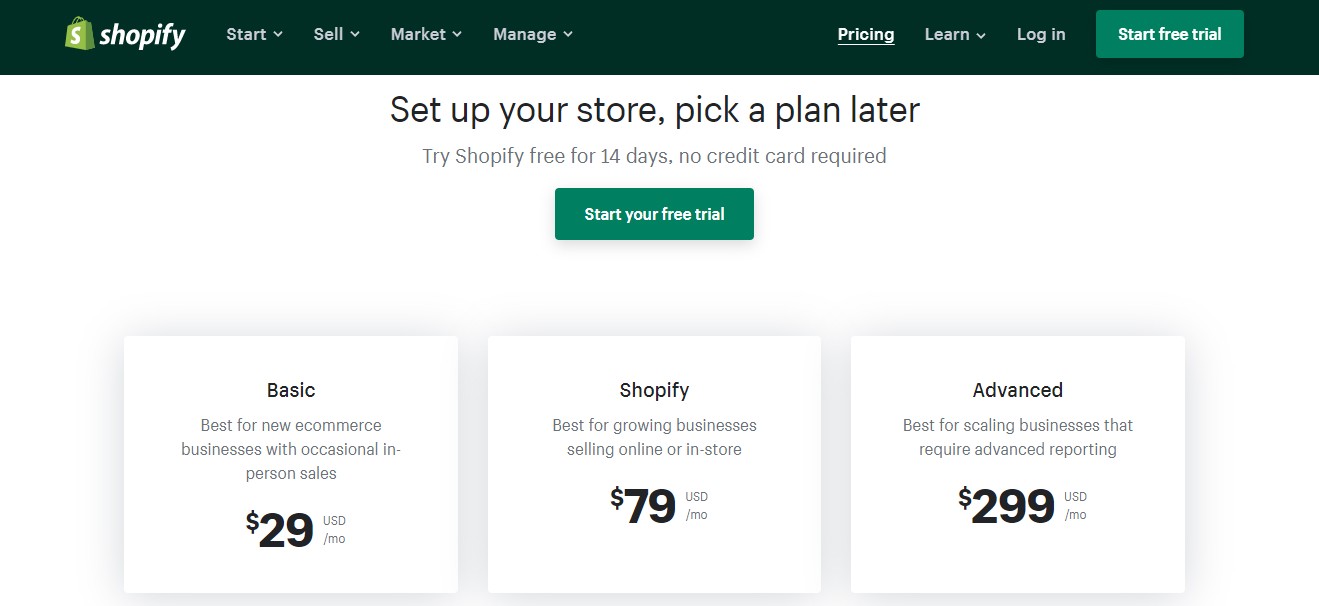
Here are the different pricing plans offered by Shopify:
Shopify Lite
This is Shopify’s cheapest plan, and it costs $9 a month. It, however, does not come with a Shopify store. It just offers you a few Shopify features if you have an existing website.

Basic Shopify Plan
This plan costs $29 a month plus a 2.9% charge and $0.30 in fees per transaction. This is the cheapest plan that comes with a standalone Shopify store, and it is your most basic option if you are just starting out with Shopify.
Shopify Plan
The standard Shopify plan costs $79 a month plus 2.6% and $0.30 per transaction. It has more available features when compared to the previous plans.
Advanced Shopify Plan
This premium plan costs $299 a month plus 2.4% and $0.30 per transaction. It offers the most features and even has certain features that are not available in the previous plans.
Shopify Plus
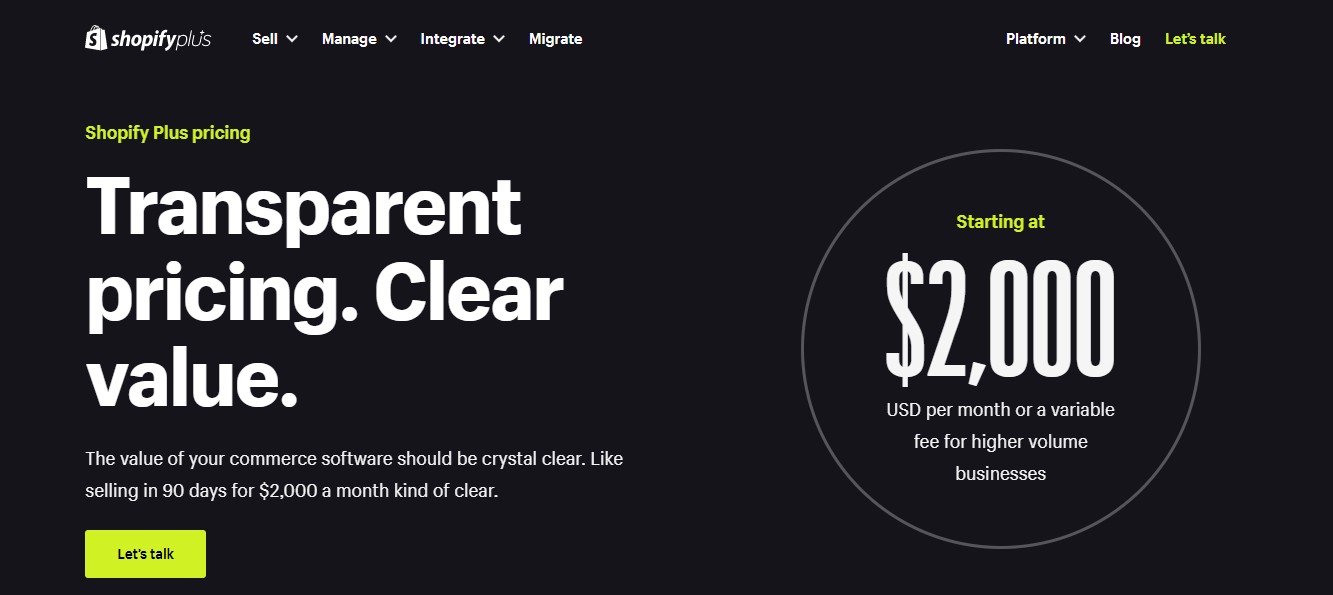
This plan was designed with large-scale enterprises in mind. It provides a comprehensive solution for the peculiar needs of these large businesses. Shopify customizes the cost of this plan according to the requirements of each business. However, it starts at $2000 per month.
You may also have to consider the cost of a “.com” domain which is around $14 a year. While Shopify offers several free themes, if you want a better theme, you may have to consider the cost of a premium theme. You may also want to integrate third-party services and apps with your store, which will cost you some money.
Do You Need a Tax ID to Set Up Your Shopify Store?
If you have an already registered business or intend to register one, you will have to provide your business’ tax ID. However, keep in mind that you do not require a registered business to run a Shopify store.
You can choose to run it as a sole proprietor. If you do this, all you will need to set up your Shopify store is your Social Security Number or Social Insurance Number.
Steps to Starting a Shopify Store
One of the reasons Shopify is so popular is the ease of setting up a store. Previously, setting up an eCommerce store required a lot of time and technical know-how. With leading eCommerce platforms like Shopify, you can now set up your online store in a few minutes.
Now, let us get down to the steps you have to take to set up your Shopify store. Here are 11 steps that will help you set your new store up for success:
1. Get Prepared
Before setting up your Shopify account, there are a few things that you have to put in place. This includes your business idea, business name, products you want to sell, a logo, and maybe product images.
You need to have most of the above in place to set up a functional store and then do your research.
You also need to have quality, optimized product images before setting things rolling.
2. Create Your Shopify Account
The next thing to do is create your Shopify account if you haven’t. All you need for this is your email address and a password. You will not be required to confirm your email just yet. This means you can just proceed to set up your store.
Next, you’ll have to fill in a name for your store. This name has to be unique, or you cannot purchase a domain on Shopify.

Afterward, you will be prompted to fill in a few more details about yourself and what you plan to sell.
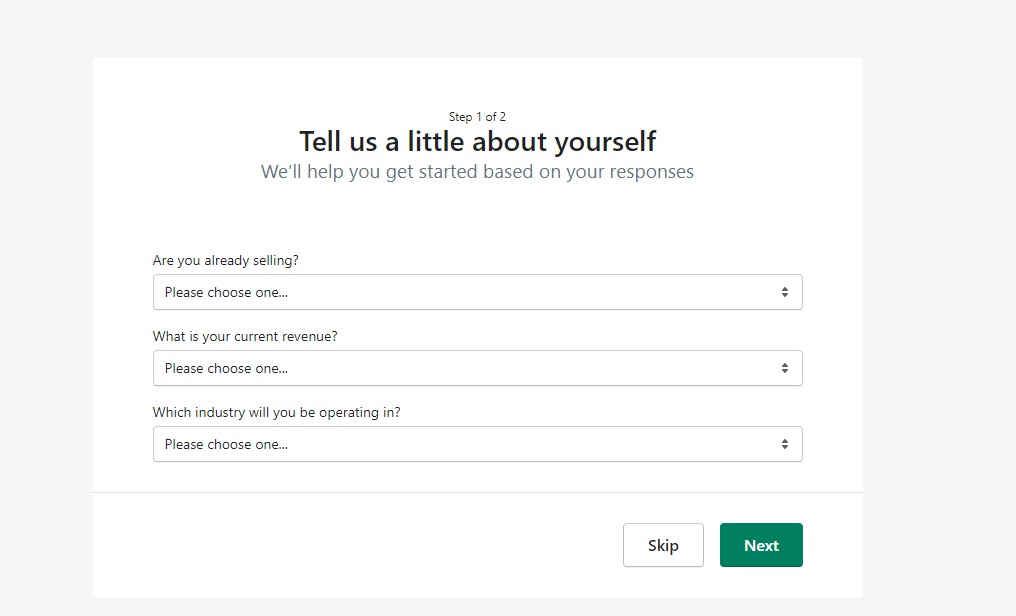
Shopify will use some of the information you provide to configure aspects like taxes and currencies.
3. Add Products
After creating your store, the next step is to add products. That’s a no-brainer.
To do this, go to the Products tab and click Add Products, then you can list your products.
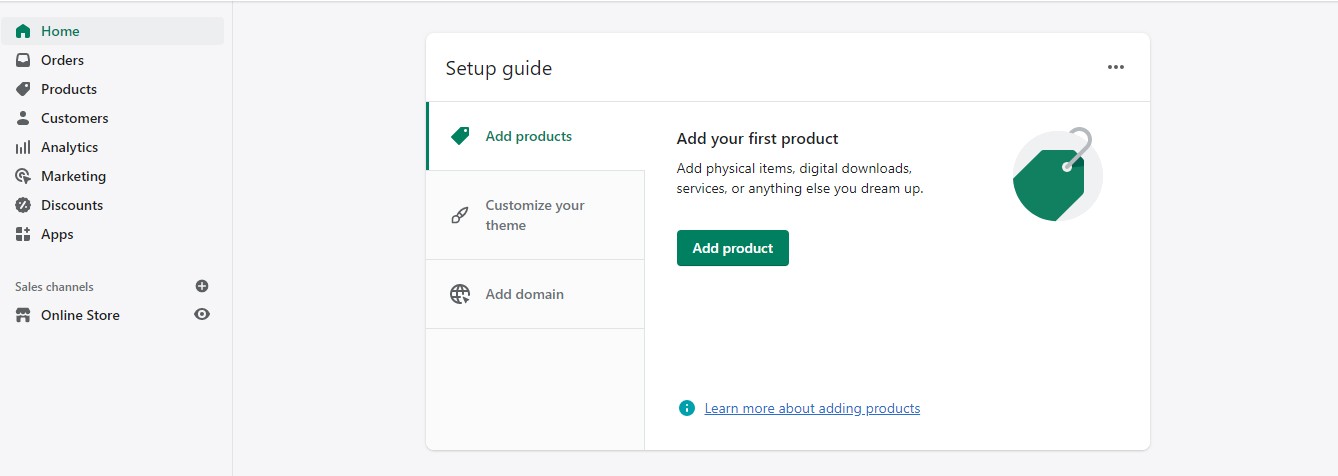
After listing your products, you will also need to add some information about them. This includes a product image, a product title, a price, and a product description. All of this helps provide more details to your customers about your products.
You can organize your products using different labels. Some available labels include product availability, product type, vendor, tags, and collections. These tags help you group your products and make it easier for your customers to shop.
4. Add Pages to Your Site
After adding products, the next step is to add pages to your website. You can start with the most important ones, such as Contact, About Us, FAQs, and Privacy Policy and Terms of Service.
Your Contact page provides your customers with ways to reach out to you if they need to make any inquiries, while your About us page helps you build a more personal connection with customers. Your FAQ page should answer common questions that your customers tend to have.
You will need a Privacy Policy page, particularly if you plan on running Google ads. Once you input your address and email, you can generate a privacy policy using Shopify’s free policy generator.
5. Select a Theme and Customize Your Store
At this point, your store is starting to have some form. The next thing to do is work on your store’s outlook and customize its appearance.
To do that, Look for the Online Store tab and click Themes under it.
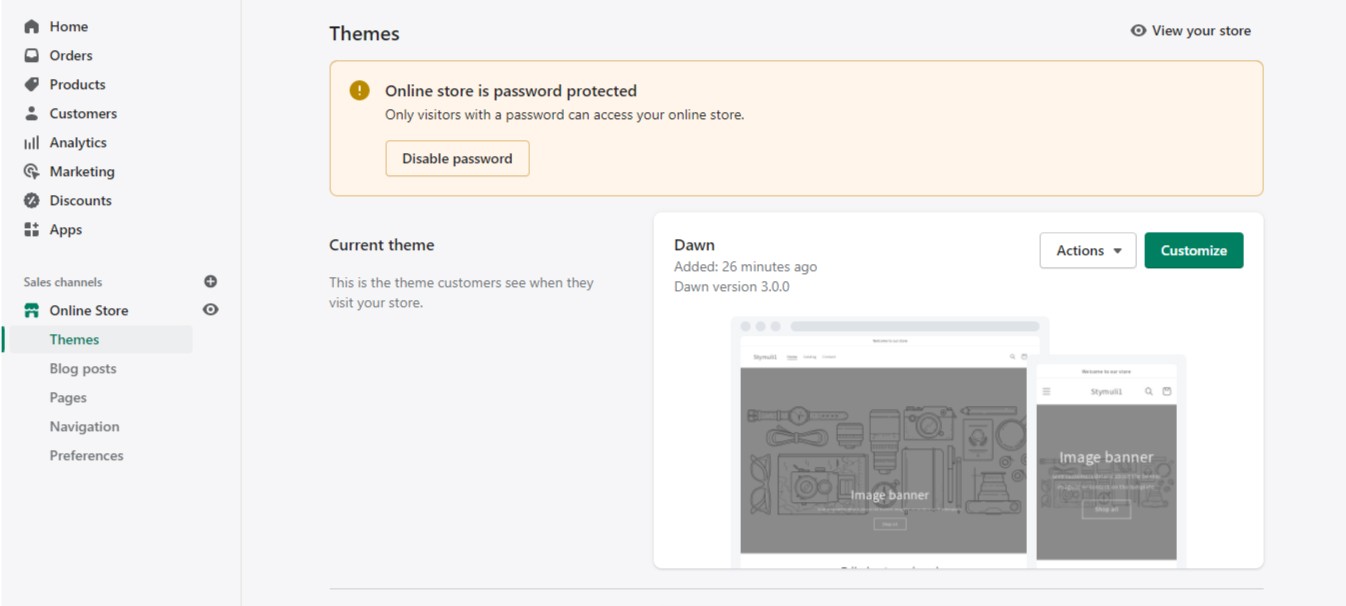
To start your customization, you have to pick a theme. Themes are templates for designing your store. They simply form the basis upon which you can make further customization. Shopify offers both free and paid themes to suit a wide range of industries and business types.
After selecting your theme, you can make further adjustments to your homepage. Feel free to play around with some features and rearrange some elements. This is so that you can see how best your homepage can suit your specific business goals. You also get to customize your store’s colors and fonts to suit your brand and your navigation menus.
6. Customize Your Checkout Page
To finalize your Shopify store set up, customize your checkout page. Go to the Theme Settings tab and click on Checkout to do this. You can tweak a few things like the imagery, the layout, and the background color.
As a beginner, you probably do not need to implement any form of complex script. You can enable tipping from your customers or require your customers to check out using their emails. This will make it easier to reach through email marketing.
7. Set up Shipping
Shipping is another aspect of your eCommerce business that you need to give attention to. This is because of the several factors and variables that go into setting it up. These include product weight, shipping destinations, packaging costs, marginal profits, and carrier rates.
To set up shipping, click the Settings tab and then Shipping. On this page, you can set up and configure your shipping options. If you want, you can select a third-party delivery company you intend to work with. If you offer custom packaging to your customers, you can add the dimensions on this page.
It might interest you to know that Shopify allows you to set up free shipping for your store.
8. Configure Your Taxes
Like every other profit-making business, you have to remit taxes to the government on each sale you make.
Shopify makes this process easy for you by handling the tax calculations automatically. It uses a worldwide sales tax rate for doing this. Regardless, it is still advisable to do your research or consult the services of a tax professional just to be sure that you are charging and paying the right amount of taxes. To be sure, you can also check with your local tax office.
If there are specific tax requirements within your region, you can choose to override these settings. Go to Settings, click Taxes and edit the rates or override the default rate.
9. Set up Payment Gateways
This step is the last step required to have a functional Shopify store. Setting up your payment gateway is important to accept payments on your store.
To do this, navigate to Settings >> Payments. At this point, you have to input some necessary details concerning yourself and your business. These include your name, address, last four digits of your Social Security Number, banking information, and a few other things.
Setting up your payment gateway on Shopify is pretty easy since Shopify accepts most of the common payment methods. If you choose to use Shopify’s own payment gateway, Shopify Payments, you will be able to receive payments at no extra cost to you. However, there are over 100 third-party payment gateways that you can choose from like PayPal and Stripe.
At this point, you are ready to launch your store.
10. Prepare for Launch
These last two steps are important to increase your chances of running your Shopify store successfully and smoothly.
First of all, you want to add a custom domain. A domain is simply your web address. If you previously have a registered domain, you can link it to your Shopify store. But if you do not have one yet, you can buy directly through Shopify.
You’ll be paying around $14 per year for a typical “.com” domain. Once you buy it, it will connect to your store automatically. This is not compulsory, but your store will have to run on a Shopify subdomain without it.
Afterward, set up analytics. Shopify offers a good analytics tool that you can use in tracking your sales taxes and profits. But you probably want to track more than just that. You can set up Google Analytics and Facebook Pixel for better analytics.
Lastly, you can choose to add Shopify apps to your store to enjoy certain specific benefits each app offers. In the Shopify App market, there are apps for almost everything, ranging from monthly budget calculation to social media advertising and email list building, just to mention a few.
11. Launch Your Store
At this point, you will have successfully set up your Shopify store, and it is ready to be launched and made visible to the public.
To do this, go to Settings and click on Preferences. At the bottom of the page, you’ll find a button to remove your password page. Do this, and you are set to go.
Conclusion
Congratulations on learning how to create and launch a Shopify store. While this did not take too much of your time, it is an achievement worth celebrating. You are now officially a Shopify merchant. All you have to do now is to start making money.
Do you have a Shopify store already, but you are finding it hard to convert your visitors into paying customers? Adoric can help!
Adoric helps you increase your chances of converting your Shopify store visitors to customers by displaying attention-grabbing marketing campaigns.
What’s more, Adoric allows you to create exit-intent popups to win back abandoning shoppers and, hence, reduce cart abandonment.
Adoric is easy to use, intuitive, pocket-friendly, and comes with lots of other marketing features.
Ready to start making money from your Shopify app? Get the Adoric Shopify app now!


