
Unlike brick-and-mortar stores, online shoppers depend majorly on picture quality to decide whether or not to buy an item.
A study by Justuno shows that 93% of online shoppers consider visual appearance when shopping online. So if you want to sell a ton of products on Shopify, you have to get your Shopify product photography right.
If you have a Shopify store and want to learn how to improve your e-commerce product photography, you have come to the right place. We’ve got all the information you need to create stunning product photos for your store.
What is Shopify Product Photography
Shopify photography refers to taking high-quality pictures of the products you sell on your Shopify store. These photos are important because they help customers see what your product looks like before they decide to buy.
Good Shopify photography can make your products look more attractive and professional, leading to more sales.
It includes taking clear pictures from different angles, using good lighting, and sometimes editing the images to make them look even better. You can also add lifestyle photos, which show the product being used, to give customers a better idea of how it works in real life.
That said, there are different styles or ways of photographing Shopify products to attract the attention of potential customers.
Styles of Shopify Product Photography
When selling products on Shopify, using the right types of photos is important to attract customers and help them understand what they are buying. Here are some common styles of Shopify product photography:
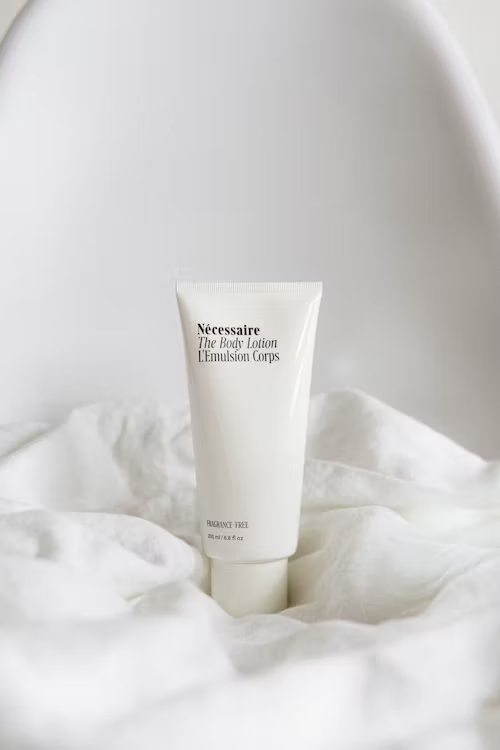
White Background Photos
These are pictures of your product taken on a plain white background. The white background makes the product stand out, showing all its details clearly without distractions. This is a clean and professional way to present your product.
Lifestyle Photos
These photos show your product being used in real-life situations. For example, if you sell furniture, the picture might show the furniture in a living room. This helps customers imagine how they would use the product in their own lives.
The image below shows a woman modeling some jewelry on her fingers as an example of a lifestyle photo.

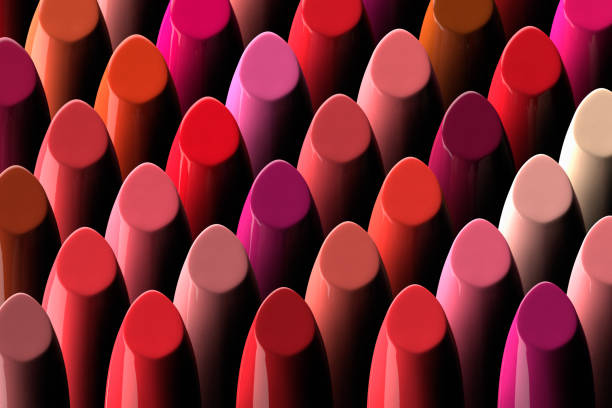
Zoom or Close-up Photos
These are photos that focus on a specific part of your product, showing details up close. This is useful for highlighting features like texture, material, or small design elements, helping customers see the product more clearly.
Steps of How To Do Shopify Product Photos Shoot
Now that you understand what product photography is, it’s time to get into how to do it. The steps discussed in this guide will help you successfully shoot high-quality photos for your Shopify store.
1. Create a Shot List
Creating a shot list helps you stay organized and ensures you capture all the necessary photos.
Start by listing all the products you want to photograph and plan the types of photos you need, such as white background shots, lifestyle photos, and close-ups. For each product, decide on the angles you’ll shoot, like front, side, and detail views.
If you need props or models, include those in your list. This makes sure you don’t miss any important shots and helps the photo shoot run smoothly.
For Example: Let’s say you’re photographing a new line of handmade ceramic mugs. Your shot list might look something like this:
Product: Handmade Ceramic Mug
- White Background Shots:
- Front, side, and top view (showcasing the interior glaze)
- Lifestyle Shots:
- Mug on a rustic wooden table with a steaming coffee (props: table, coffee, spoon)
- A person holding the mug near a window (props: model, natural light)
- Close-ups:
- Detail of the handle design
- Texture of the ceramic glaze
Pro Tip: Consider using apps or tools like Shot Lister and Studio Binder to create a digital shot list that you can easily update and check off as you progress through the shoot.
2. Choose Between Natural and Artificial Light
Typically, there are two major sources of light when it comes to photography and they are natural and artificial light. The choice of light plays a role in the outcome of your product photo. Let’s find out the difference between these light sources.
Natural Light
Natural light, as the name suggests is the light that comes directly from the sun. Sunlight is one of the best and most affordable lighting options for product photography. It provides soft, even light that reduces shadows and highlights your product’s true colors.
You can use natural light by positioning your product near a large window, preferably one that doesn’t get direct sunlight, to avoid harsh shadows. Mornings and late afternoons often provide the softest natural light, known as “golden hour.”
Artificial Light
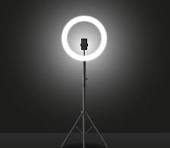
This, on the other hand, is obtained from man-made lighting devices. Artificial lighting is a great option if you don’t have access to good natural light or are shooting indoors. There are different types of artificial lights, but the most common are external flashlights, softbox lights, and ring lights.
External flashlights provide brighter light to support the camera’s internal flashlight. Softbox lights provide even, diffused lighting, while ring lights help reduce shadows and brighten your product evenly. When using artificial lights, aim them at your product from different angles to avoid harsh shadows or overly bright areas.
For example, let’s say you want to photograph a flower vase in a studio, using artificial light (softbox light) will be your best bet. All you have to do is position the softbox light on both sides so that the product is well-lit to prevent unwanted shadows.
The image below shows how you can position your lighting devices to capture quality photos.

3. Choose the Right Equipment
There is a ton of equipment at your disposal when it comes to product shoots. Once you have determined the types of shots you want to take and your light source, it becomes easier to select the right equipment for your shoot setup.
Below is a list of the common and necessary tools for a successful product shoot.
Camera
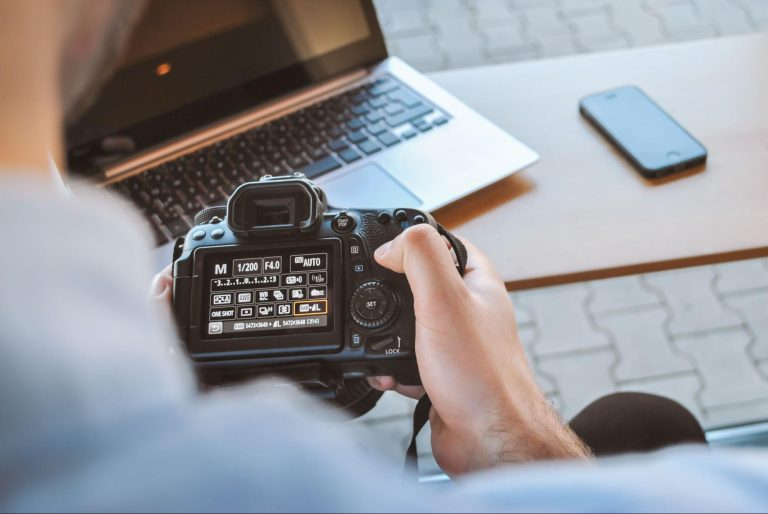
You don’t always need an expensive, professional camera. If you have a good smartphone with a high-quality camera, you can still take great product photos. However, if you want even better quality, using a DSLR (digital single-lens reflex) camera can give you sharper, clearer images. A DSLR lets you control settings like focus and lighting more easily, which can help your photos look more professional.
Below is a what a DSRL camera looks like.

Tripod
A tripod is a must-have for product photo shoots. It keeps your camera or phone steady so your pictures don’t turn out blurry. Using a tripod also helps you take photos from the same angle and height, making your product images look consistent. This is important because it creates a clean, professional look across your store.

Lighting Tools
While natural light can work well for many product photos, having some artificial lighting equipment gives you more control, especially if you’re shooting indoors or in low-light conditions.
- External Flashlight: A camera external flash is a separate flash unit that you can attach to your camera. It gives you more control over the lighting and can create different effects, like soft shadows or dramatic lighting. You can also move the flash around to get different angles.

Softbox Lights
These are popular for product photography because they provide soft, diffused light that reduces shadows and bright spots. Softboxes create even lighting across the product, making it look more professional.

Ring Lights
Ring lights provide even lighting and are great for smaller products. They help eliminate shadows, especially in close-up shots, and can highlight the details of the product.
Diffusers: Soften the Light
Diffusers are used to soften and spread light evenly across the product, which helps prevent harsh shadows or overly bright spots. This is especially useful when using strong artificial light or shooting in direct sunlight. The diffuser is usually placed over the camera flash or softbox light to reduce the harshness of the light coming from it.

Reflectors: Bounce Light for Even Lighting
Reflectors are essential tools that help manage the lighting in your photoshoot by bouncing light onto your product to reduce shadows. They can make a big difference, especially when natural light or other light sources don’t fully illuminate your product.
Types of Reflectors
Professional reflectors are usually available in white, silver, or gold.
- White reflectors provide soft, natural light.
- Silver reflectors brighten the scene and give sharper light.
- Gold reflectors add a warm glow, which is ideal for products like jewelry or skin-care items.

Background/Backdrop
A clean and simple background, like a white backdrop, is ideal for product photos. You can use a large sheet of white paper, a white wall, or a professional backdrop stand to create this look.
The white background helps your product stand out and keeps the focus on the item. If you want to do lifestyle photos, choose a background that fits the product’s use, like a kitchen for food items or a living room for furniture.
If you want to add a pop of color or texture, you can use colored backdrops that complement the product. For example, a pastel background works well for beauty products, while a wooden backdrop may enhance the natural look of handmade or eco-friendly products.

For example, if you want to photograph a flower vase, the following equipment may be the best option for your shoot.
1. A DSLR or mirrorless camera like the Nikon D7500 or Canon EOS Rebel T7 is great for capturing the fine details of your flower vase, such as its texture and design.
2. A white backdrop to make the vase pop if it has bright colors or intricate designs.
3. A tripod to keep your camera steady, especially when shooting at different angles or using slower shutter speeds. Also, it helps prevent you from taking blurry shots.
4. Softbox light to light up the setup and highlight the vase’s color and material, like glass, ceramic, or metal.
5. Silver or white reflectors to bounce light onto the vase, especially if it’s shiny or reflective.
Note: you can have someone stand by your side holding the reflector in the right direction.
4. Set Up Your Studio for a Product Shoot
After choosing the right equipment, setting up a simple product photography studio becomes easy.
For example, below is a practical approach to getting the best shot for your flower vase setup.
- Set the camera to a high resolution for clear and sharp images. Use a standard or wide-angle lens to show both the vase and flowers in great detail. Adjust the focus to highlight key features, like the vase’s pattern or material.
- Mount your camera on the tripod and adjust it to capture the vase from different heights and angles, ensuring that the shot remains steady and sharp, even when zoomed in.
- Position the softbox or light source above or beside the vase to create a gentle glow without harsh reflections or glare.
- Use a diffuser to soften the light. This will prevent harsh shadows from casting on the product, making it look uneven.
- Place the reflector opposite your light source to fill in any dark areas and ensure the vase is evenly lit from all sides. This will highlight its shape and features without causing harsh shadows.
- Drape the backdrop behind and under the vase, ensuring the background doesn’t distract from the product. Make sure the vase is the main focus, and the backdrop complements its style.
Below is what your setup could look like.

5. Select the Appropriate Camera Setting
 Now that your setup is ready, the next step is to find the best setting options that can help you capture awesome shots. There are so many options to consider when you get to this stage and they include;
Resolution
The resolution determines how sharp and detailed your photos will be. Always set your camera or smartphone to the highest resolution available. This ensures that your product photos are crisp and clear, which is especially important when customers zoom in to see the details of your product.
Also, high-resolution photos look more professional and are less likely to appear blurry when displayed on your Shopify store.
ISO
ISO controls how sensitive your camera’s sensor is to light. For product photography, you generally want a low ISO setting (like 100 or 200) to keep the images clear and free of grain or noise.
A lower ISO works best in well-lit environments, like when you’re using natural light or studio lighting. If you’re shooting in low light, you may need to increase the ISO slightly, but be careful not to go too high, as this can make your photos look grainy.
Aperture
The aperture controls how much light enters the camera and also affects the depth of field. For Shopify product photos, a higher f-stop (like f/8 or f/11) is often best because it keeps the entire product in focus.
A higher aperture makes sure that even the smaller details of your product are sharp, rather than only a part of the product being clear while the rest is blurry.
Shutter Speed
Shutter speed determines how quickly your camera takes a photo. For product photography, you want to use a faster shutter speed to avoid any blur from camera movement. A shutter speed of around 1/125 or higher is usually ideal, especially if you’re using a tripod.
If you’re using natural light or have bright lighting, you can increase the shutter speed even more to capture sharp images without any motion blur.
White Balance
White balance adjusts the colors in your photo to make sure they appear natural and accurate. For product photography, it’s important to get the colors right so customers can see exactly what the product looks like. If your camera’s white balance is off, the product might look too yellow, blue, or green.
Most cameras and smartphones have automatic white balance settings, but if you notice the colors look unnatural, try adjusting the white balance manually. You can choose settings based on the type of light you’re using, like daylight, cloudy, or fluorescent light.
Focus Mode
Proper focus is crucial for product photography because you want your product to be sharp and clear. For most Shopify product shoots, use auto-focus to make sure the camera locks onto the product.
If you’re taking close-up photos of small details, you can switch to manual focus to ensure that specific areas of the product are perfectly sharp. On a DSLR, you can also use focus points to choose exactly where you want the camera to focus, such as the center of the product.
Shooting Mode
Many cameras and smartphones offer different shooting modes, such as portrait, landscape, or manual mode. For product photography, Manual Mode or Aperture Priority Mode is often the best choice.
Manual mode gives you full control over all settings, including aperture, shutter speed, and ISO. Aperture priority mode allows you to set the aperture while the camera automatically adjusts the shutter speed to match the lighting conditions, making it easier to get the right focus.
File Format (JPEG vs. RAW)
If you’re using a DSLR, you may have the option to shoot in RAW format instead of JPEG. RAW files contain more data and allow for better editing later on, especially if you need to adjust brightness, color, or sharpness.
However, RAW files are larger and require more storage space, so if you prefer simplicity, JPEG is still a good option. JPEG files are smaller and ready to use right away, though they don’t offer as much flexibility during editing.
Example of How to Apply The Right Settings for a Product Shoot
Still on the flower vase example, the following camera settings may be the best options to help you get quality shots.
- A medium aperture around f/8 to f/11 will help to keep most of the vase in sharp focus while slightly blurring the background.
- An ISO of 200 is ideal if you are using artificial light or shooting in low light, you may increase the ISO slightly but avoid going too high to maintain a clean, clear image.
- A shutter speed between 1/60 to 1/125 seconds will also be perfect for the shoot. This allows enough light to enter for a well-exposed shot while keeping the vase crisp and clear.
- Next is to set the white balance toTungsten or Fluorescent since you are using artificial lights, to get accurate colors.
- Another necessary setting is the focus mode. Using manual focus or single-point autofocus ensures that the vase is in perfect focus, especially on key details like the pattern, texture, or rim of the vase.
- Shoot RAW so that you can have better flexibility when editing the photos.
6. Arrange Your Product
Now that you have gotten your camera settings and studio setup right, the next step is to arrange your product.
A well-arranged product photo helps highlight the product’s features and makes it more appealing to potential buyers.
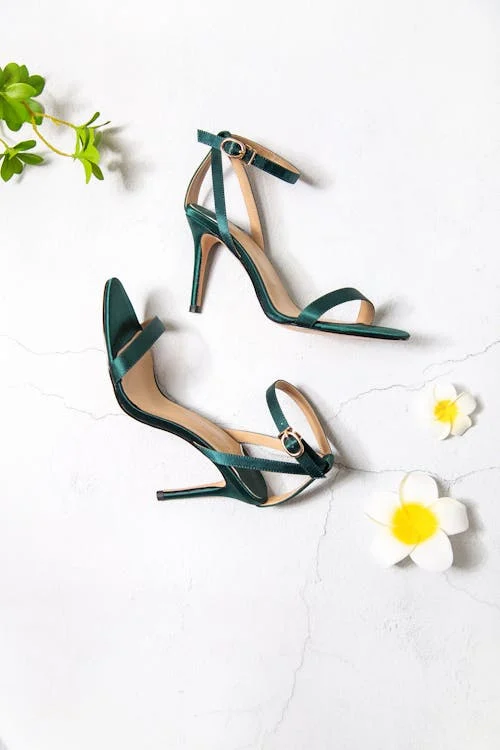
For example, say you want to photograph a high-heel shoe, you can do the following when arranging the product.
- Make sure the shoe is clean and in good condition. Remove any dust, stickers, or imperfections.
- Position the heels carefully by placing one stiletto slightly in front of the other. Tilt the front heel to the side so customers can see both the side profile and the design details, like the shape of the heel and any special features.
- If the stiletto has interesting details, like embellishments or straps, arrange them in a way that showcases these elements. For example, gently adjust the straps or buckles to make sure they are visible.
- Add props that complement the product but don’t distract from it. For instance, you might include some flowers as a prop.
- Change the product’s position or angle for different types of photos. Take photos from the front, side, back, and any other angles that highlight its features.
Below is an image of a well-arranged open-toe heel accessorized flowers.
7. Shoot Different Angles/views Of The Product
Capturing different angles of your product is important for your product shoot. This helps customers get a full view of the item, especially since they can’t touch or see it in person.
For example, if you are photographing a Sneaker, you may want to capture the following views;
- Front View: This angle shows the shoe’s overall design. It’s the first thing people notice, so make sure it’s clear and straight on.
- Side View: The side of the sneaker shows its profile, including any special designs, branding, or patterns. This angle helps customers see how the shoe will look on their feet.
- Top View: This shot gives a clear look at the laces and the overall shape of the shoe. It’s also a good angle to show the comfort of the insole.
- Back View: The back of the sneaker can show details like the heel design and any logos or branding. This angle is important for showcasing unique features like heel support or structure.
- Sole View: The sole of the shoe is important for customers who want to know the grip or traction. A clear view of the sole lets them see the material and texture.
- Angled View: Taking a picture from a slight angle between the front and side gives a dynamic view, showing the sneaker’s shape and style more naturally.
Below is the image of a sneaker shot from multiple views.
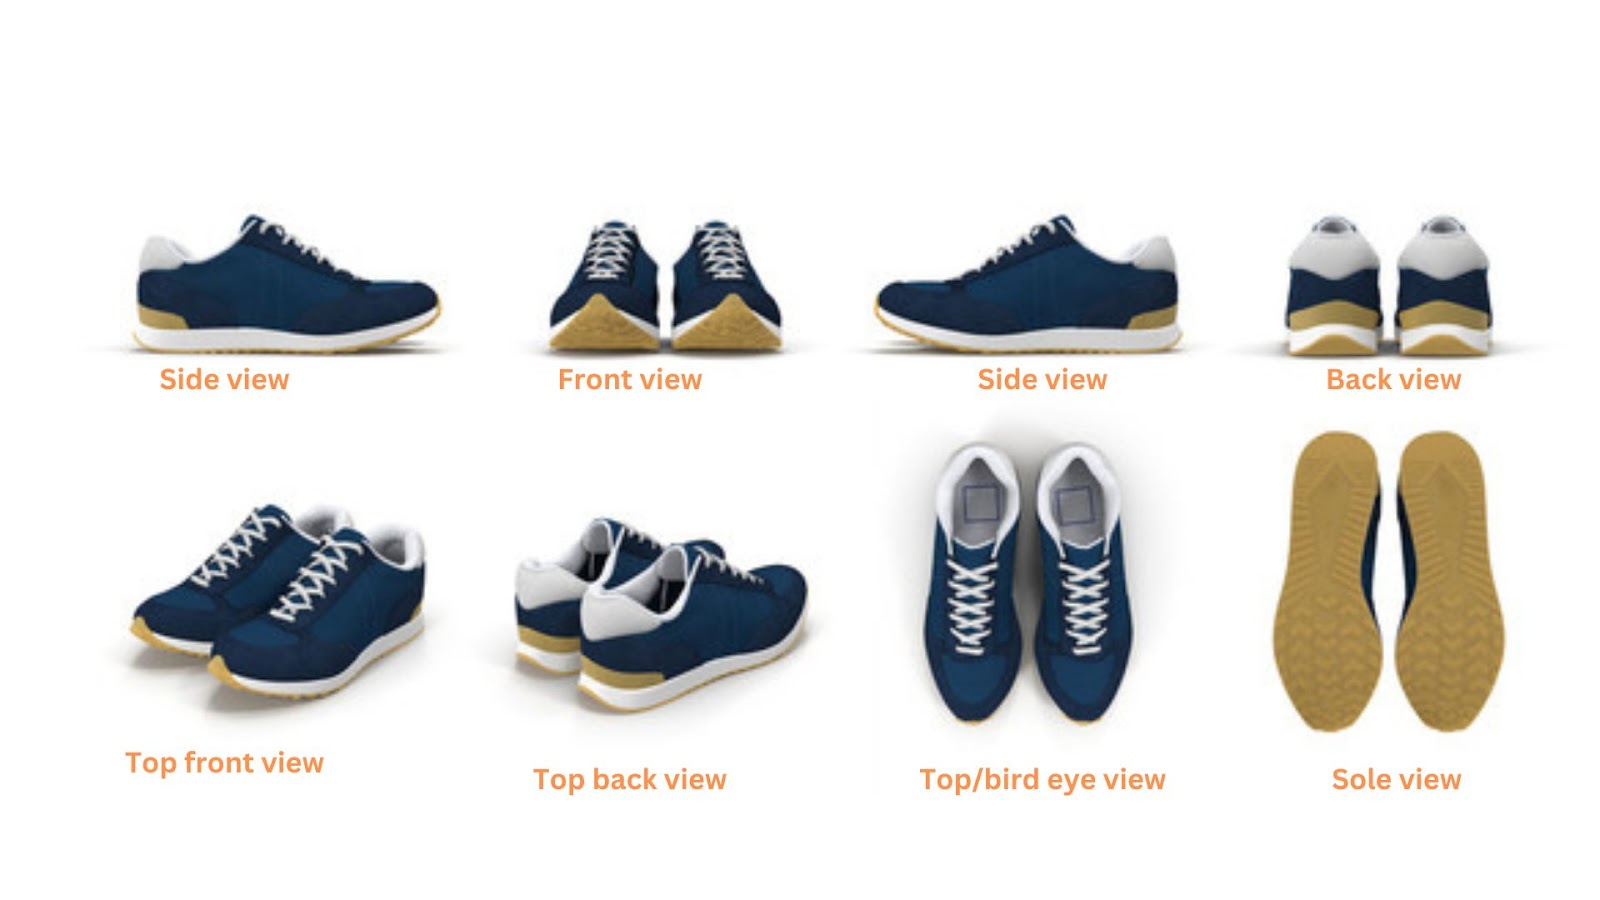
Image Source: Adobe Photo
8. Edit Your Photo
After completing the shooting session, you can tweak the photos to look even better. There are many easily accessible photo editing applications that can help you edit your images the way you want. Photoshop and Adobe Lightroom are two prominent editing tools for you.
For example, if you have a photo with poor lighting like the one below you can edit it to make it look better.

Image source: Squareshot
To improve the look of this image do the following
- Increase the brightness to make the product more visible. This will help the product stand out and look more appealing.
- Since the photo lacks light, adjust the exposure to bring more light into the image. Be careful not to overexpose it, as that can wash out details.
- Lighten the shadows to reveal more of the product’s details, especially around the edges or in darker areas.
- Increase the contrast to make the product stand out more by creating a clearer difference between light and dark areas.
- Poor lighting may affect the colors in the photo, making them appear dull or off. Adjust the color balance to ensure the product looks true to its real color.
- Poor lighting can sometimes make a photo look blurry. Boosting the sharpness will help bring out the details of the skincare product, making it clearer and more focused.
After editing it this is what the image should look like;
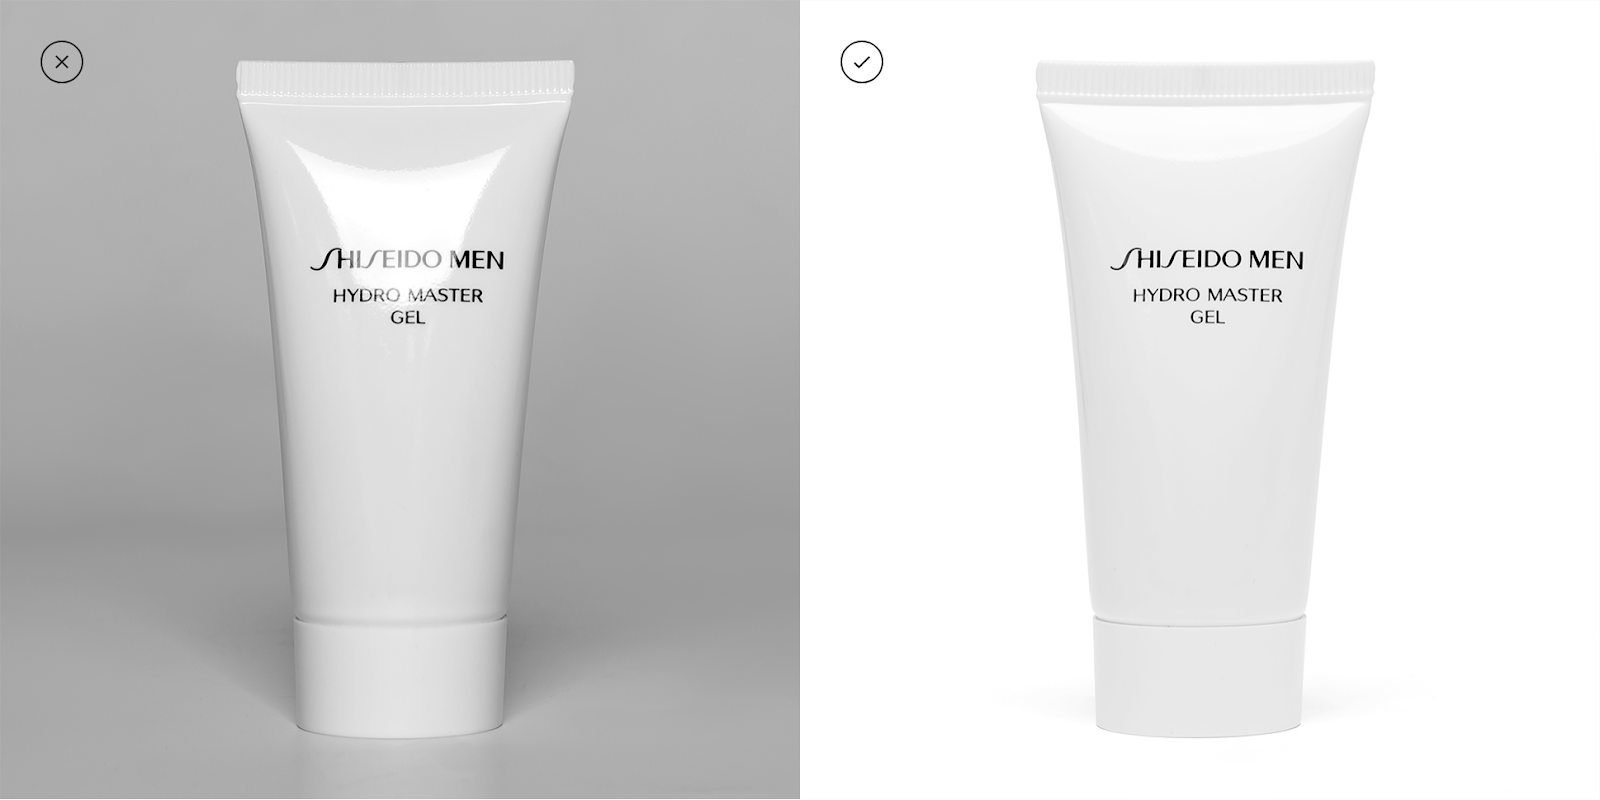
Image source: Squareshot
While doing it yourself can help you cut costs, editing too many product images at a time can become overwhelming. Instead of getting worked up with this task, you can outsource to experts who offer product photography services. These experts will get your catalog up and running within a short period.
You can also consider using ready-made presets if you make use of Lightroom. PresetLove is a library of free Lightroom presets that can help you quickly apply professional-grade edits to your photos.
Shopify Product Photo Optimization Guideline
When shooting, editing, and formatting your product photo, you will want to keep in mind the standard image specifications which are as follows;
File Name
Rename your image files to include relevant keywords that describe the product. For example, instead of “IMG1234.jpg,” use “red-leather-handbag.jpg.” This helps search engines understand what the image is about.
In addition, Maintain a consistent naming pattern for all your product images. This makes it easier to organize and find your images when needed.
File Format
There are several image file formats available at your disposal. However, using the right will ensure you maintain image quality and size while uploading the photo to your Shopify store. These formats include;
- JPEG (JPG): This is the most common format for product photos because it offers good quality with a relatively small file size. It’s ideal for photographs and detailed images.
- PNG: This format is best for images that require transparency or have text and graphics. PNG files tend to be larger than JPEGs, but they offer high-quality images with sharp details.
- WebP: This format provides excellent quality with smaller file sizes compared to JPEG and PNG. It’s becoming more popular for web images because it combines the benefits of both formats.
Image Size
Using the right image size will ensure that your images display correctly on your Shopify store without compromising your website load time.
Shopify recommends images with a resolution of 2048 x 2048 pixels for high-quality zooming. However, you can resize your image to fit the image container on your website. For instance, if your website displays product images at 800 x 800 pixels, resize your photos to match this size.
Shopify Apps for Optimizing Product Photos
1. TinyIMG optimizes and compresses your images to reduce their file size without affecting quality. This speeds up your website, improves SEO and enhances the overall user experience by making your store load faster.
2. Image Resizer is an AI-powered Shopify app that helps you quickly resize your product photos in bulk. It makes sure all your images are the same size, giving your store a clean and professional look. This saves time and ensures your website loads faster.
3. Pixc Photo Resize automatically resizes and crops your product photos to make them look uniform and professional. It saves time by quickly making all your images the same size, which is important for a well-organized Shopify store.
4. Swap Photo Editor is an app that lets you easily edit and replace product photos. It allows you to crop, resize, and remove backgrounds, making it simple to create professional-looking images without needing special software.
5. Booster SEO & Image Optimizer was designed to help your store rank better in search engines. It optimizes your images and fixes SEO issues automatically, improving your site’s speed and helping more customers find your products online.
Expert Summary
Good product photos can help boost your sales. To get it right, you need good lighting and a simple background. Use a tripod to keep your camera steady and take multiple photos from different angles. Also, consider editing your photos after the shoot to get better results.
Tal Revivo, Founder of Adoric.
Conclusion
Product photography, when done right helps build trust and encourage more people to buy from your store. By using the right equipment, setting up proper lighting, selecting a clean background, and shooting from different angles, you can show your products in the best way. Also, editing and optimizing your photos will ensure they load quickly and look professional.