FThe aftermath of COVID-19 brought about an explosion of online buying and selling. Many e-commerce platforms are constantly reinventing their service deliverables. This, we believe, led Shopify, one of the leading e-commerce platforms, to acquire Handshake.
Handshake is a wholesale marketplace that connects manufacturers and retailers, making buying and selling easy without costing a fortune.
In this post, you will discover all you need to know about Shopify Handshakes, how it works, product categories, how to become a vendor, and other need-to-knows.
Let’s get started.
What is Handshake Shopify
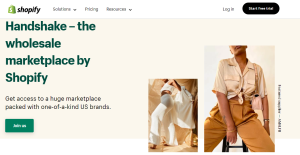
Handshake Shopify, formerly known as Handshake. is an online B2B marketplace that brings brands and retailers together, allowing brands to sell their products wholesale to retailers at no extra cost.
Acquired in 2019, the platform enables brands in the United States to promote their businesses, connecting them to a larger audience. Verified brands can publish and sell products without paying a service charge.
Shopify Handshake has a list of product categories, and brands can only sell products belonging to any of the categories listed on the platform.
Also, brands are not allowed to sell third-party products. Retailers cannot resell Handshake products on other e-commerce platforms like Etsy, Amazon, eBay, and more.
Presently, Handshake is only available to Shopify businesses in the US. However, Shopify may open it up to other countries in the future.
How Does Shopify Handshake Work?
Shopify Handshake is an intuitive yet straightforward platform. It functions by following some pre-requisite and patterns that are easy to comply with. Below is how Handshake works;
- Create a Shopify store: you must own a Shopify store and have made a couple of sales because your Handshake wholesale profile will be anchored and controlled through your Shopify admin.
- Install and apply for a Handshake account: this is necessary to create a wholesale profile.
- Get your store approved: it takes the Handshake team 10-14 business days post-application to assess and verify your Shopify store before giving you permission to create a profile.
- Set up your wholesale profile: now that your store is verified, you can go ahead to create and customize your wholesale profile. This should also include setting up your Shopify payment before you make your first sale.
- Publish products: after setting up your profile, list and publish your products.
- Receive and process orders: you can process customers’ orders with ease and receive payment in no time at no cost.
Voila! You are in business.
What You Should Know Before Creating a Shopify Handshake Account
As with any successful commercial enterprise, there are certain rules governing the use of the platform. Familiarize yourself with them before applying as a vendor:
- You must own a Shopify store
- Your business needs to be established in the United States
- Your payment currency must be USD
- You must own your own brand because Handshake does not allow reselling of third-party products
- You must own an active store that has processed at least a few orders
- Have a direct payment provider enabled on your Shopify store
- Your products must fall under one of the product categories listed on Handshake
- Products comply with the Handshake product guidelines and the Handshake Terms of Service
- Your product image must comply with Handshake’s photography guidelines
- You have made at least 1000 USD in sales from your store.
- Have at least one published product
- Your store must have a shipping rate with a US shipping zone
The Handshake team may have other unwritten rules for deciding eligibility, but these are the known rules.
What to Sell on Shopify HandShake Marketplace

Here are the available Shopify Handshake product categories:
- Hand-picked collections
- Accessories
- Apparel
- Beauty & Wellness
- Food & Drinks
- Home & Lifestyle
- Jewelry
- Kids
- Stationery
- Pets
After setting up your product under the appropriate category, Shopify will notify you via email whenever someone makes an order. You can also track your order history from your Shopify admin under the Order section.
Applying for a Shopify Handshake Account
To successfully become a Handshake vendor, you need to follow the right approach. Here is a detailed guide on how to own a Handshake account
Apply and Install Handshake
Follow these steps to apply;
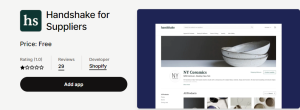
- Visit the Handshake for Suppliers page in the Shopify App Store
- Click on Add app, then click Add sales channel
- Check the box beside the dialog that reads – By applying to Handshake, I confirm I am not a reseller, and I’ve read and agree to Shopify’s Privacy Policy and Handshake’s Terms of Service. Then click Continue to accept the terms and conditions.
After installing and adding the Handshake sales channel to your Shopify store, you need to wait for the Handshake team to your business. The timeline is usually 10-14 business days.
You will receive an email from the team that tells you whether or not your business meets the eligibility criteria. If it does, you can proceed to set up your supplier profile.
However, if after 14 business days you don’t receive an email about your business eligibility status, you can contact the support team for a follow-up. Also, you can reapply to sell on Handshake. All you need to do is to reinstall the Handshake sales channel in your Shopify domain.
Setting up Handshake Supplier Profile
After your Shopify store must have been approved for a Handshake account, you can set up your supplier profile by following the steps below.
Step 1: Add a Header Image and Logo
Adding a header image and logo is a great way to make your profile authentic and personalized. Ensure you use the correct specification when setting up your header image and logo.
Format your header image to a PNG or JPEG version with a dimension of 2048 x 512 pixels. Keep the size under 20mb. For logo images, other specifications stay the same aside from the dimension, which should be 512 x 512 pixels.
Note that you can’t change the positioning of the image after uploading, and the images will be automatically cropped from the center. So you must get the format right from the jump.
Steps to adding header image and logo:
- From your Shopify admin settings, select Apps and sales channels
- From the Apps and sales channels page click on Handshake
- Click Open the sales channel
- Click Profile
- In the customization section, click Upload Image or Upload Logo to upload the header image and logo
- Choose an image from your computer’s files
- Click on Save.
Step 2: Add Details About Your Brand
Add other vital details about your business to help it stand out from other brands. This could include your brand’s origin story, vision, mission, social media handles, contact details, and more.
Steps:
- Follow the steps described above to locate Open sales channel.
- Click Profile.
- In the Details section, enter your brand name, description, and email address. Retailers can send messages to this email address.
- Add your business’s Facebook and Instagram account details. (this step is optional)
- Click Save.
Step 3: Set Up Shipping Rates
If you have a Shopify store where you sell retail, set up a separate shipping rate for your Handshake orders. But if you sell wholesale on your Shopify store, you can use your store’s shipping rate to process Handshake orders.
Shopify Handshake allows you to set a flat rate and up to 3 conditional shipping rates.
Follow these steps to set up your flat shipping rate
- Locate Open sales channel.
- Click Preferences.
- In the Shipping section, select Set custom rates for Handshake (recommended).
- Enter the value you want to charge for shipping in the Shipping Rate field. If you want to make the shipping free, then enter the value of 0.
- Click Save.
Follow these steps to set up your conditional shipping rates
- Locate Preferences.
- In the Shipping section, select Set custom rates for Handshake (recommended).
- Click Add conditional rates.
- Enter up to 3 conditions based on the order value and the corresponding shipping rates.
- Click Save.
Step 4: set a Minimum Order Value
Using Shopify Handshake means selling wholesale which raises the need to set a minimum order value. A minimum order value is the lowest order quantity or worth you are willing to sell to your customers.
- Locate Open sales channel.
- Click Preferences.
- In the Minimum order value section, enter a minimum order value.
- Click Save.
Step 5: Add Your Shipping and Return Policy
Include your shipping and return policy in your profile so customers can know what to expect from the beginning. This should include details like order processing time, shipping fees, shipping options, refund policy, and other vital details.
Steps:
- Locate Open Sales Channel > Preferences.
- In the Shipping and Returns section, add information about your order processing and delivery times, returns, and refund policies.
- Click Save.
6. Set Up Product details and Pricing
Shopify Handshakes offers flexibility when it comes to managing your product. You can publish and unpublish products, edit the product details, and price them under different categories like wholesale, retail, and minimum order.
Setting product details requires that you include details like product titles, product descriptions, product images, product variants, and product categories.
Steps for pricing individual products;
- Locate Open sales channel.
- Click Products.
- Click the product that you want to edit.
- Enter the product description in the Description section. This product description is used for your product listing in the Handshake marketplace only.
- In the Category section, select the relevant product category.
- Optional: If you want all the product’s variants to have the same pricing details, then in the Pricing section, check Apply to all variants.
- For each product variant, enter the Wholesale price, Retail price, Minimum order, and Items per case.
- Click Save.
- If your product has variants, then in the VARIANT VISIBILITY ON HANDSHAKE section, deselect the variants that you don’t want to sell on the Handshake marketplace and click Save.
Steps for pricing bulk products;
- Locate Open sales channel > Products.
- Select the products that you want to edit, and then click Edit.
- Optional: In the Category section, choose the category for your products.
- Optional: Add any additional details such as Items per case and Minimum order.
- Click Done, and then click Save.
For pricing featured products;
- Locate Open sales channel > Products.
- Click the product you want to feature, and then select Mark as featured in the Featured Product section.
- Click Save.
You can always change or edit the featured product on the product page in your Handshake sales channel.
7. Publish Your Handshake Profile
After creating your profile and setting up your profile details, publish your profile and start taking orders.
Steps:
- Locate Open sales channel > Products.
- In the Status section, click Publish profile and then click Publish.
- Click View Profile to check how your supplier profile displays on the Handshake marketplace. (This step is optional).
Note that you can unpublish your profile at any time by clicking Unpublish profile in the status section. Your profile will not be deleted, only unavailable to the public. You can re-publish it whenever you want.
Wrapping It Up
Following the details in this post, if you already own an active Shopify store and are interested in using Shopify Handshake, you can go right ahead to install the app and wait for your store to be verified.
Getting your wholesale profile verified is a win. To maximize this win, you should adopt various marketing strategies and approaches that will help drive traffic to your store and increase conversion rates.
Integrating Adoric into your Shopify store will help increase your website conversion rate, leading to more sales and revenue.
Ready to boost your site sales records by 100%. Send us a message today to get started with optimization.